OBi Configuration

OBi1 Series – OBi100, OBi110
OBi2 Series – OBi200, OBi202
OBi3 Series – OBi300, OBi302
Configuration:
Start by dialing * * * from the connected phone, then press 1 to confirm your choice, this will return the IP address of your device being a number similar to 192.168.xxx.xxx.
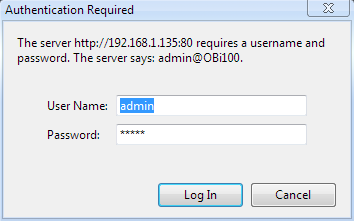
Once you get the IP address, enter it in the URL address bar "http://" of your Internet Browser to get access to the Graphic User Interface of the OBi100.
Disable Obi auto-provisioning
In order to be sure there will be no conflicts between a Manual configuration and the OBi dashboard, we recommend performing the following steps to disable auto-provisioning:
- System Management -> Auto Provisioning -> Auto Firmware Update -> Method : Disabled
- System Management -> Auto Provisioning -> ITSP Provisioning -> Method : Disabled
- System Management -> Auto Provisioning -> OBiTALK Provisioning -> Method : Disabled
- Voice Services -> OBiTALK Service -> Enable : Unchecked
NOTE: You must remove the check mark from the "default" column, then under "Method" use the 'Drop Down Selection' and choose Disabled.
Configuring the Service Providers -> ITSP Profile
General
In this section you will set the name you will use in the profile you configure.
By default you will configure the ITSP Profile A, unless you use the same device with another provider.
Name: (enter your ATA device username, from your SETUP PDF, in this field)

Next select SIP
In this section you can set the server and the port that you wish to register to.
Please note that in order to change the settings, you need to uncheck the Default box on the right hand side.
Enter the following details:
ProxyServer: (enter the SIP Address, from your SETUP PDF, in this field)
ProxyServerPort: 5060
RegistrarServer: (enter the SIP Address, from your SETUP PDF, in this field)
RegistrarServerPort: 5060

Under Voice Services, select SP1 Service (or another SPx entry, id you use the same device with another provider).
In this section, enter your VBuzzer ATA device account details (as provided in your SETUP PDF).
AuthUserName: (enter the ATA Device Username, from your SETUP PDF, in this field)
AuthPassword: (enter the ATA Device Password, from your SETUP PDF, in this field)
X_InboundCallRoute*: {>('XXXXXXXXX'):ph}
* Include the brackets. ('XXXXXXXXX') = where the X’s = ATA Device Username.
This will prevent your ATA from being able to receive ghost calls from robots on the internet.

Once you have finished changing all those settings, click on the button Submit to save the changes and reboot your OBi device, your device should now be registered.